This modpack is hidden and will not show up in the modpack index.
Table of Contents
- Requirements for "Forge Workspace"
- How to install "Forge Workspace" and select a Minecraft version
- How to install mods
- How to configure mods
Requirements for "Forge Workspace"
- Java Runtime Environment 8 (JRE 8/Java 8) 64-bit (grab it here for your OS)
- 1GB+ RAM for Java, assign it in the Technic Launcher in "Launcher Options" (top right corner) by selecting the "Java Options" tab and selecting the amount. You are save with 2-3 GB.
- Updated Graphic Card drivers (recommended)
Warning for older Minecraft versions:
Older Minecraft versions, especially modifications for it, may not be compatible with Java 8.
How to install "Forge Workspace" and select a Minecraft version!
1. Copy the API link of this modpack
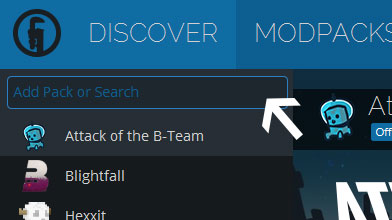
2. Start the Technic Launcher, go to the "Modpacks" tab, paste the API link into the search bar and select the modpack
3. Click on "Modpack Options" in the top right (right under the "Launcher Options"), and select the Minecraft and Forge version you want
4. Run it!
How to install mods!
1. Install "Forge Workspace" with the guide above
2a. Download some mods, but start with only a few (5-10) if you do this for your first time. You are always able to add more.
2b. Please only use curse.com, curseforge.com, minecraftforum.net and the mod author's website!! Other websites like 9minecraft.com may contain outdated versions of its mods, as well as malicious versions of them. For more information, visit stopmodreposts.org! Search for mods with NotEnoughMods, a Minecraft modification list, or google them with "minecraft *modname* *minecraftversion*".
2c. A mod will often need a "dependency" to function, since it uses it as a library for classes or it is an add-ons for another mod. If you don't include them, Minecraft will crash on you!
3a. Click in the Technic Launcher on "Modpack Options", and open the "Install Folder"
3b. For Windows: Press Windows Key+R on your keyboard and enter "%appdata%" (without " ") into the line. Navigate your way through the modpack folder with .technic/modpacks/forge-workspace
4. Open the mods folder and paste all the mods you downloaded before (from legitimate sources!!)
5. Run it!
How to configure mods!
Maybe you didn't know it, but you can configure most mods for your desire. This is VERY convenient for modpack devs, since we don't always want everything of a mod or want to modify functionality of them. For beginners, I recommend following the tutorial until step 2. and then just look in random config files, so you can see what's everything possible with these. This tutorial requires you to successfully run your project one time.
1. Navigate to the modpack folder (see above)
2. Go into the config folder and search for a .cfg file for the mod you want to modify. But:
a) For Windows, a different file editor for viewing and editing these files is highly recommended. I suggest Notepad++
b) If you don't find your config file, use the search function or look in the folders if some got generated
3. Open the file and search with CTRL+F for some keywords of the things you want to change. Mod authors often have comments to these options, read them with patience!

